Free PC Transfer Software: Old PC to New
Quick answer
- Prepare your old laptop
- Install MultiDrive
- Connect the external drive
- Write the WinPE image to this drive
- Back up your system drive to the external drive
- Boot your new laptop from the external drive
- Restore the system drive image to the new laptop's drive
When you get a new laptop, it can be exciting to unpack it. But you might not want to leave everything behind on your old laptop. Manually migrating data and settings from an old PC to a new one is the kind of task that people tend to put off for weeks. But it doesn't have to be. This guide shows how to transfer your entire system – including Windows, applications, and settings – using free PC transfer software: MultiDrive's Backup and Restore features.
How we tested: We performed this old-PC-to-new-PC migration on Windows 11 with MultiDrive 1.4, a Samsung SSD 9100 PRO 1TB +a Ugreen enclosure, using the MultiDrive WinPE image for backup and restore.
In this article
- What you'll need
- Why backup-and-restore instead of a direct clone?
- Step 1. Prepare your old laptop
- Step 2. Install MultiDrive as your PC transfer software
- Step 3. Add the WinPE image to the external drive
- Step 4. Back up your old laptop
- Step 5. Connect the external drive to the new laptop
- Step 6. Boot from the external drive and restore
- FAQ
What you'll need
Whether you're migrating data from an old PC to a new one or moving your whole system, you will choose one of two options.
- an external USB drive
- 1 NVMe/SATA external drive + the appropriate USB adapter to connect it
In our case, we use a Samsung SSD 9100 PRO with Heatsink 1TB and a Ugreen enclosure.
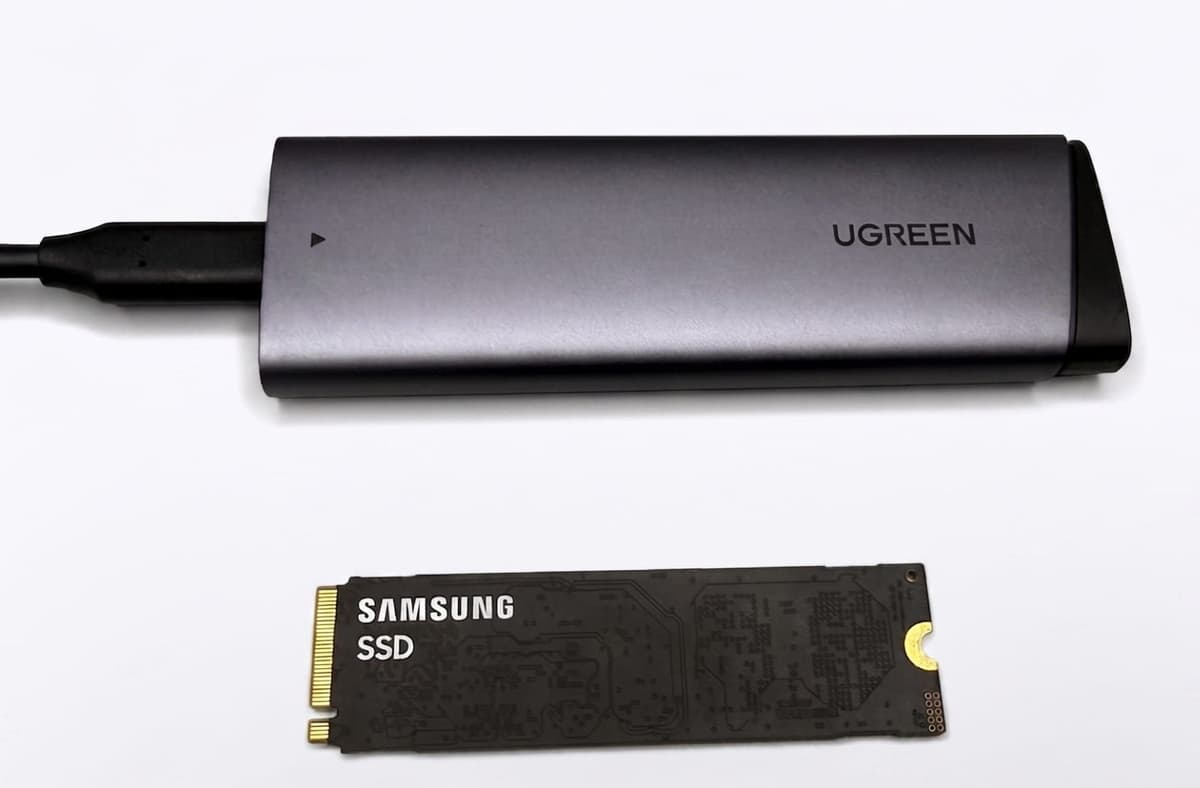
The external drive must have sufficient capacity for both the full backup and the 2 GB WinPE bootable image. MultiDrive uses ZSTD compression, making the backup smaller than a direct clone. Consult the backup storage efficiency table to determine the required space.
Why backup-and-restore instead of a direct clone?
On a desktop, it is simple: you can remove the old drive and clone it straight to the new one. Laptops don't give you that option – you can't physically connect two internal drives at once when you want to migrate from an old PC to a new one. The backup-and-restore method using an external drive is the typical solution for laptop migrations. If both drives can stay in the same machine, see how to move Windows to another drive instead.
Step 1. Prepare your old laptop
A few checks before you back up will save you trouble later.
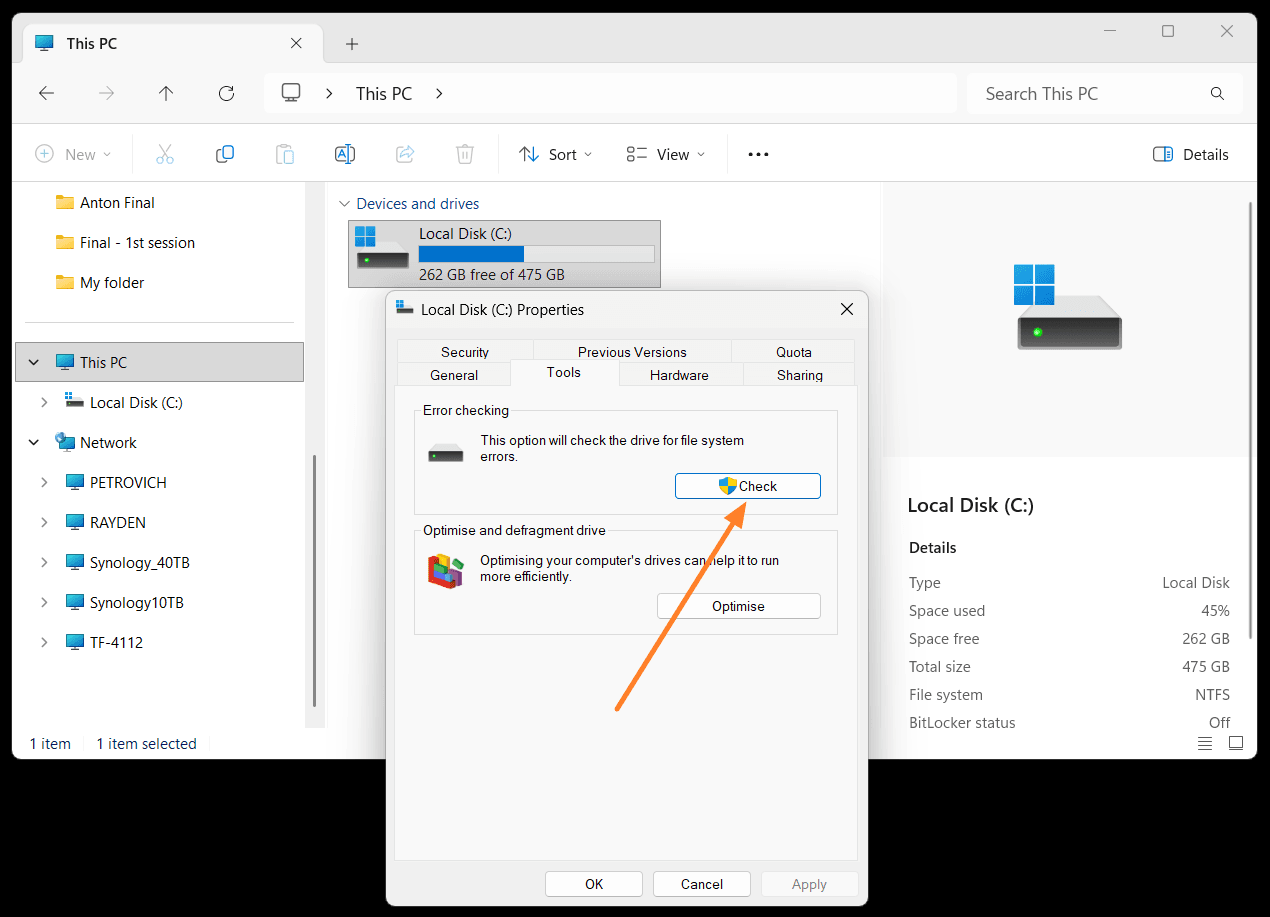
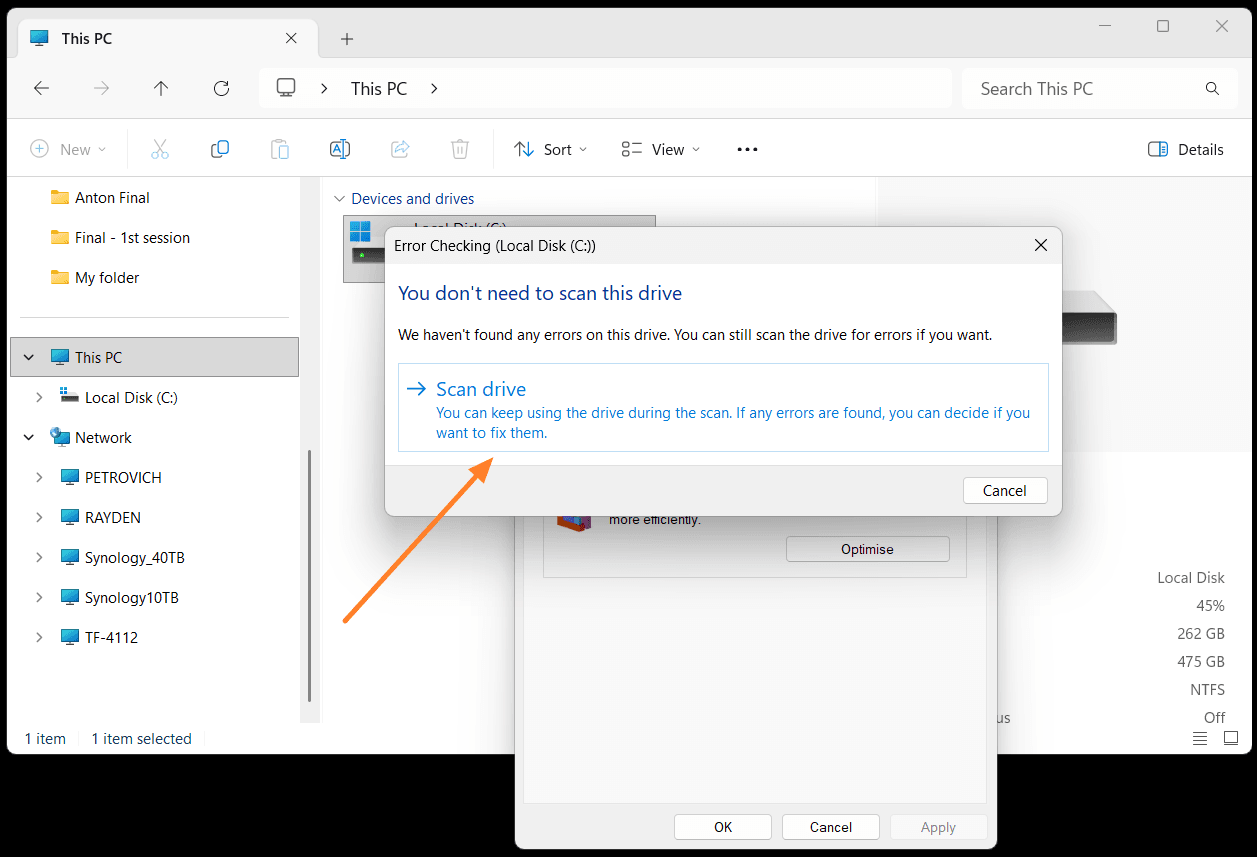
Check drive health. Press Win + E, right-click your system drive, then go to Properties → Tools → Check. Let Windows repair anything it finds – you don't want existing errors carried into your backup.
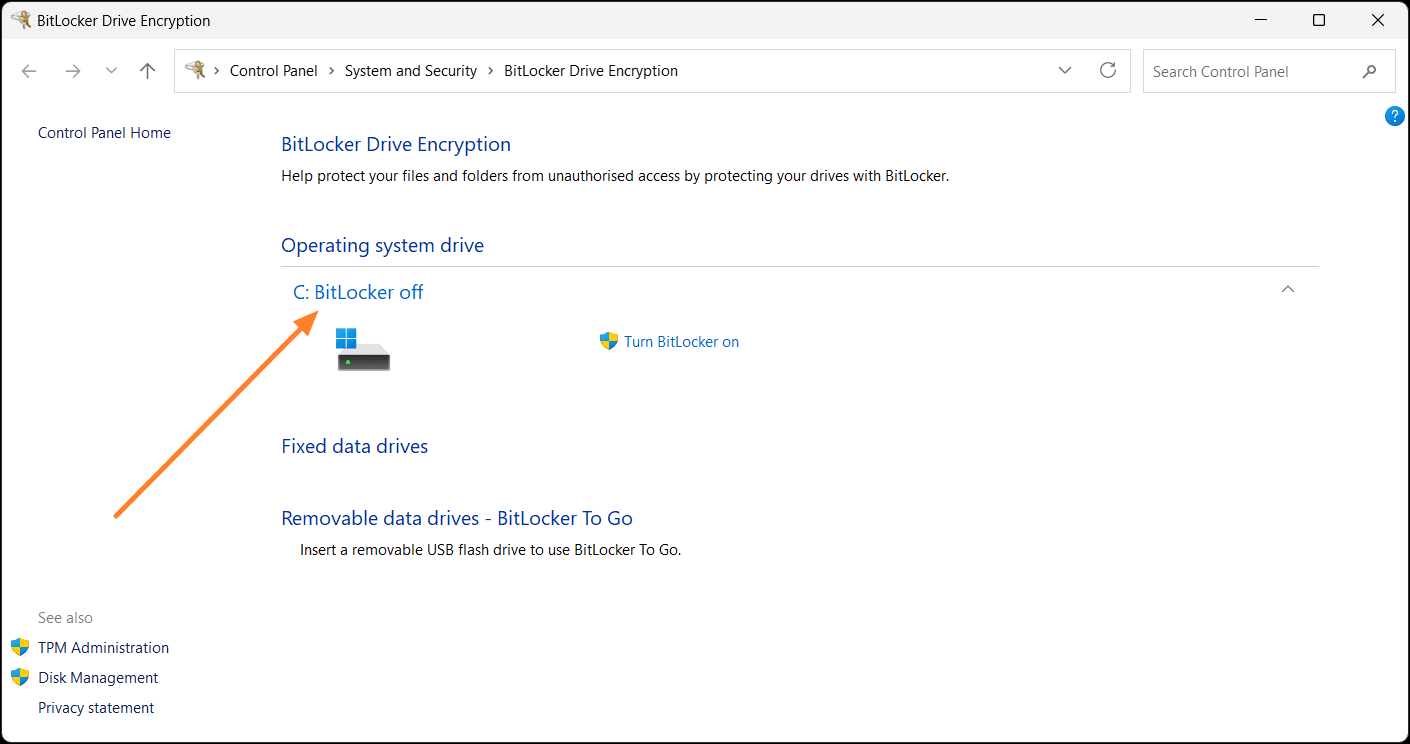
Turn off BitLocker.
If it is supported and enabled, you can disable BitLocker by performing these actions:
- Start
- Type BitLocker
- Manage BitLocker
- Turn off
This one's important: if BitLocker stays on, your backup gets encrypted, and without the recovery key you won't be able to restore it on different hardware.
Update Windows. Not strictly required, but if you're on Windows 11, it's worth grabbing the latest updates first via Win + X → Settings → Windows Update.
Step 2. Install MultiDrive as your PC transfer software
We'll use MultiDrive, a free PC transfer tool. Go to the MultiDrive download page for the regular installer, and the WinPE download page for the ZIP file containing the WinPE image. If you would prefer to use Rufus, get the ISO file instead. For more on the bootable environment, see the MultiDrive WinPE guide.
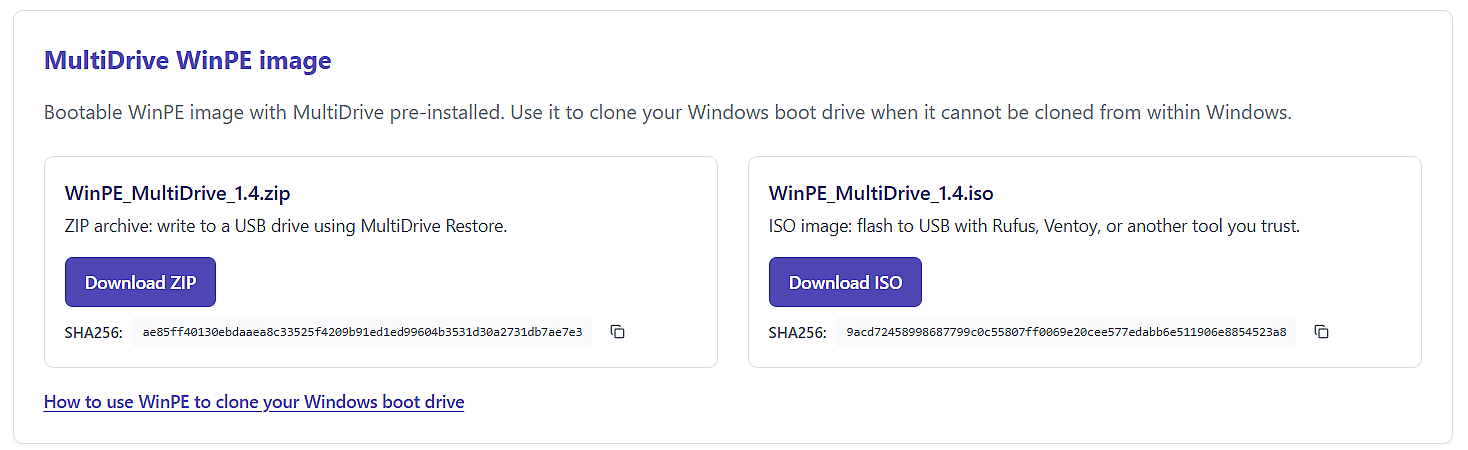
Install MultiDrive on your old laptop.
Connect your external drive to the old laptop. Once more, make sure that the storage space is bigger than the space used by your current drive, because it will need to hold both the backup and the bootable image.
Step 3. Add the WinPE image to the external drive
Next, add a bootable WinPE environment on the external drive so the new laptop can run the restore from it.
- Launch MultiDrive.
- Click Restore.
- As the Source, select the WinPE ZIP you downloaded.
- As the Target, select the external drive itself.
- Double-check your selections, then click Restore.
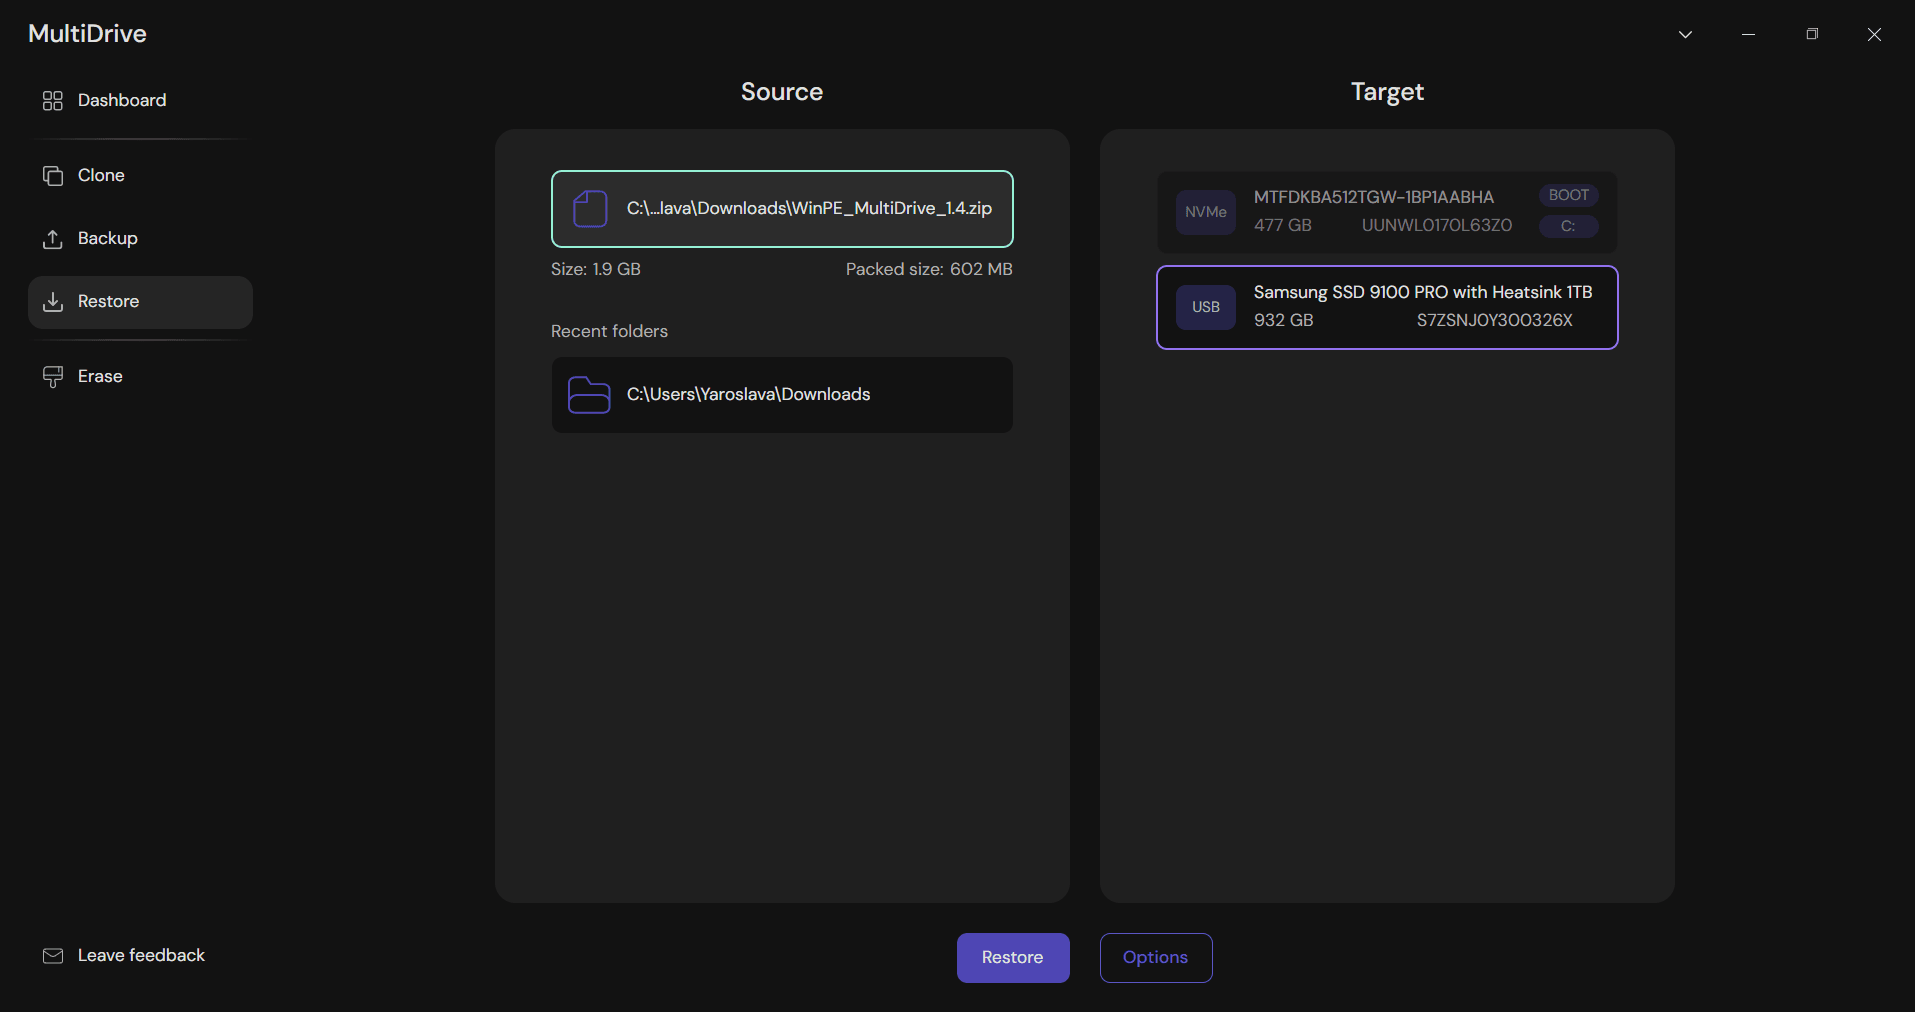
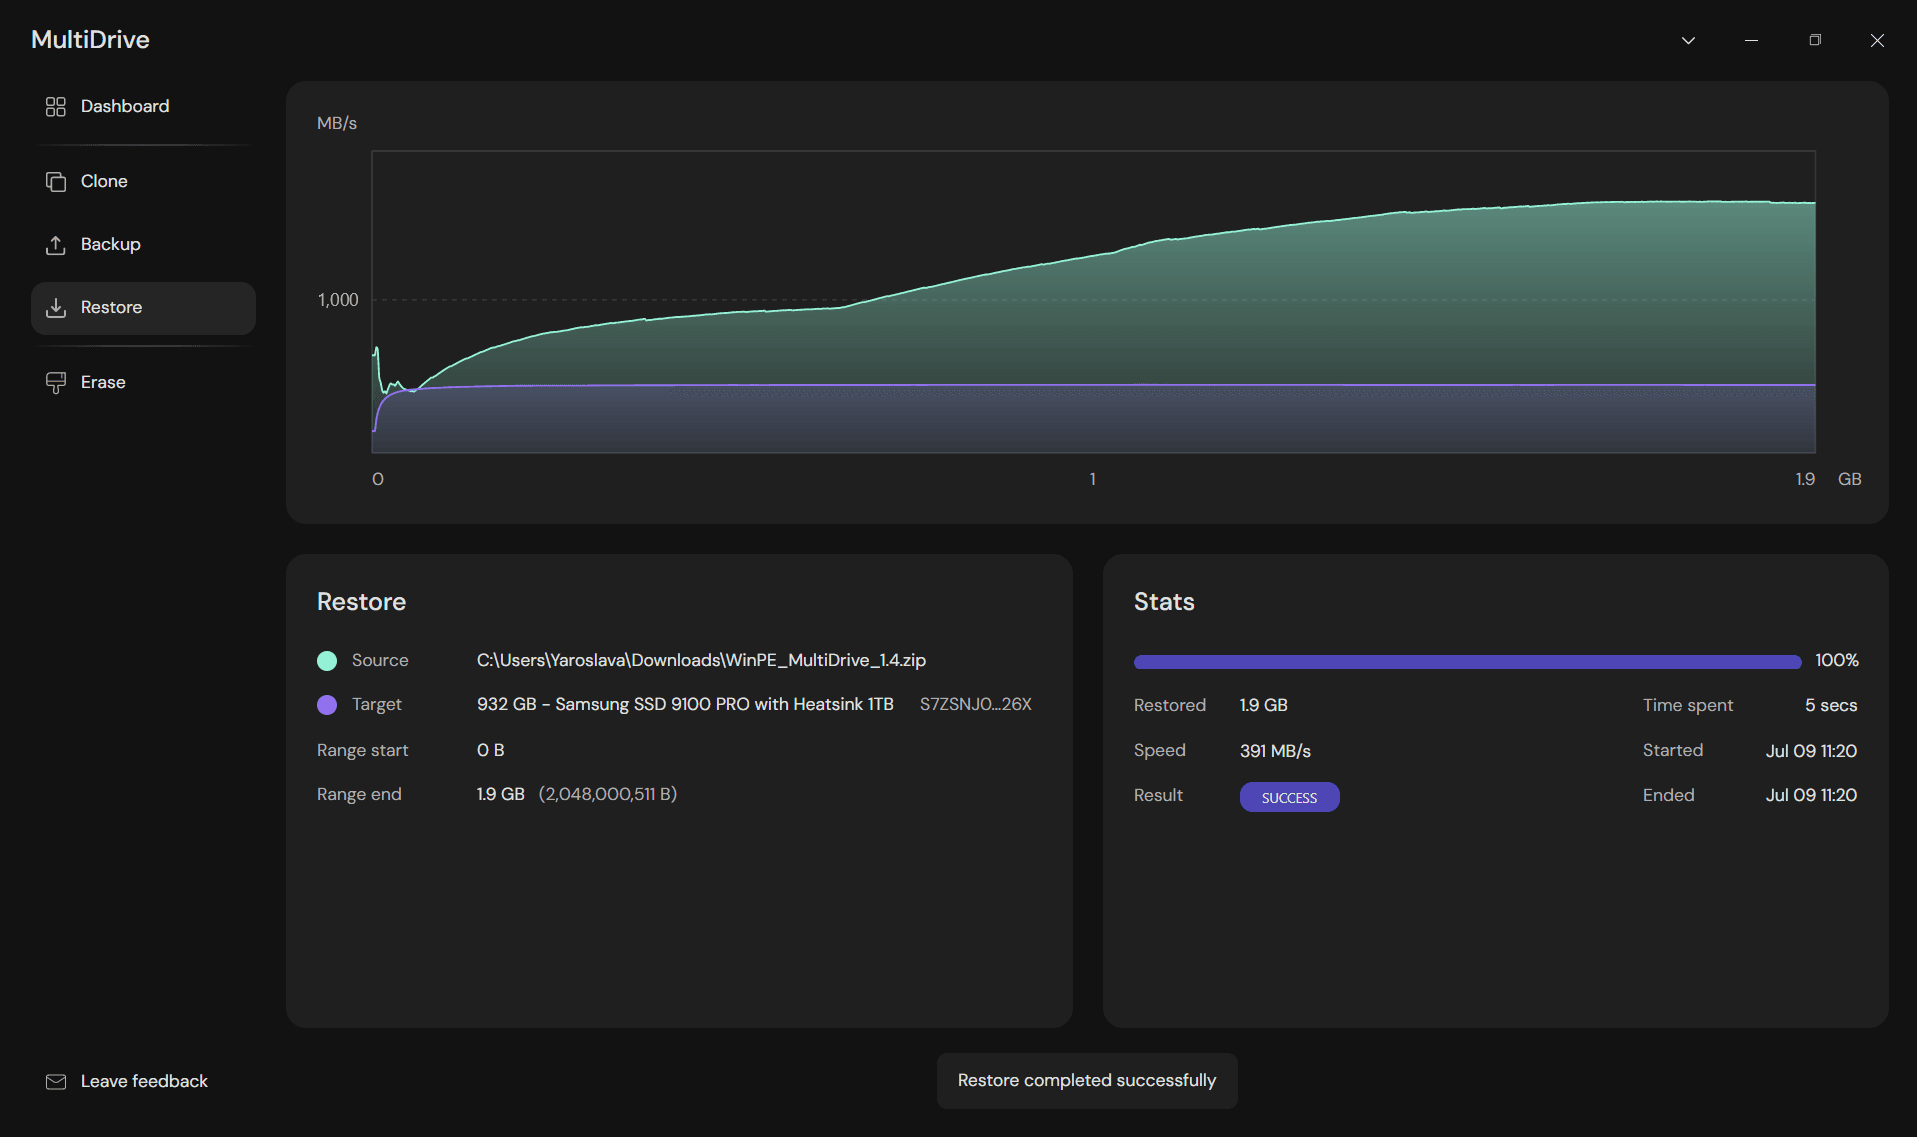
The drive is now a bootable recovery environment.
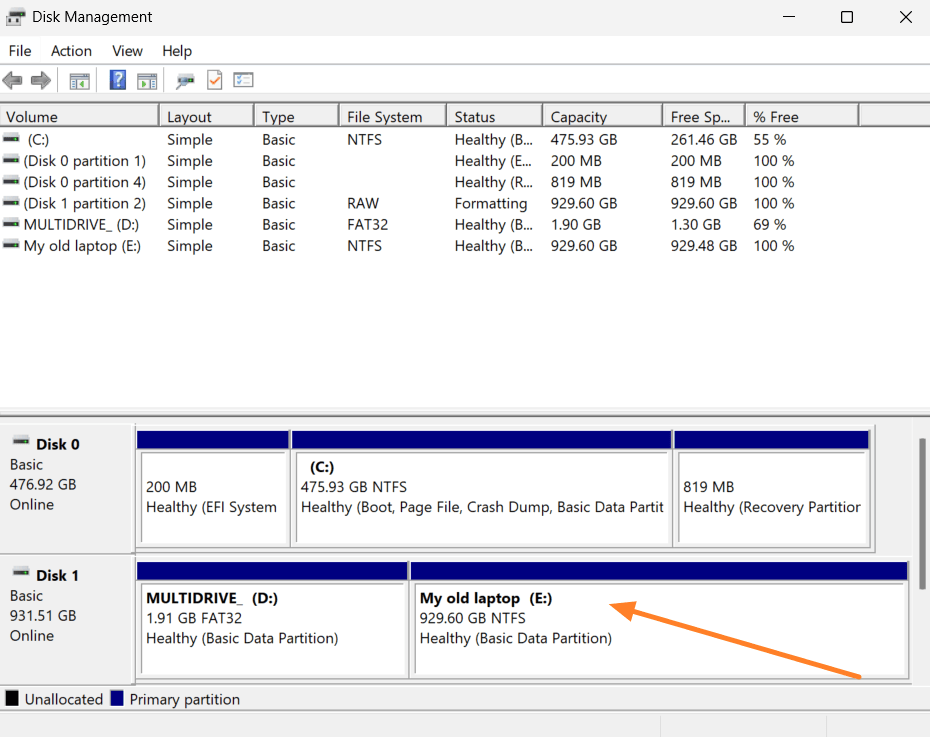
On a 1TB external drive, the WinPE image occupies only a small fraction of the space, leaving the rest unallocated.
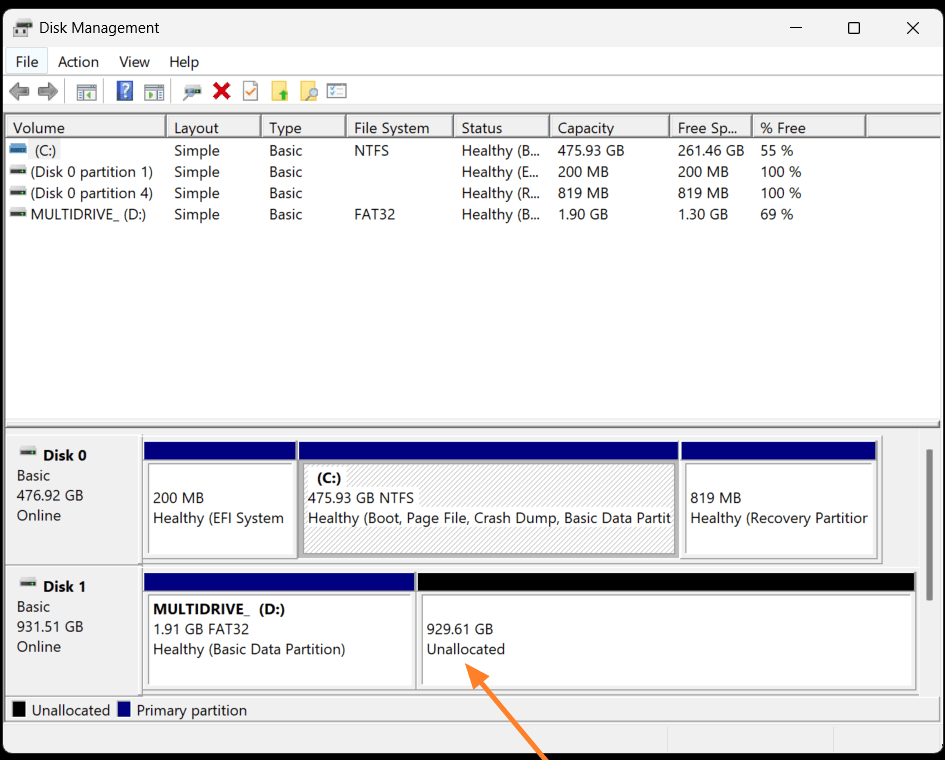
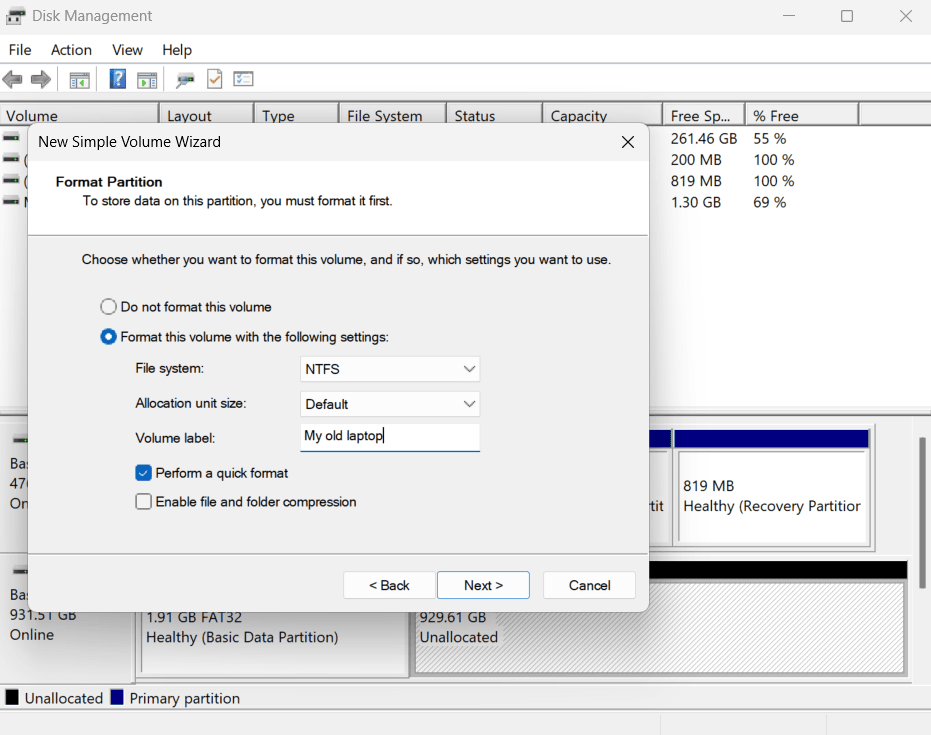
Open Disk Management and create a new volume in that unallocated space; we will name it something like "My old laptop."
That's where the backup will go in the next step.
Step 4. Back up your old laptop
Restart the old laptop and enter BIOS (usually by pressing F2, F10, F12, Delete, or Escape).
Select the external drive as the boot device.
MultiDrive will launch automatically inside the WinPE environment.
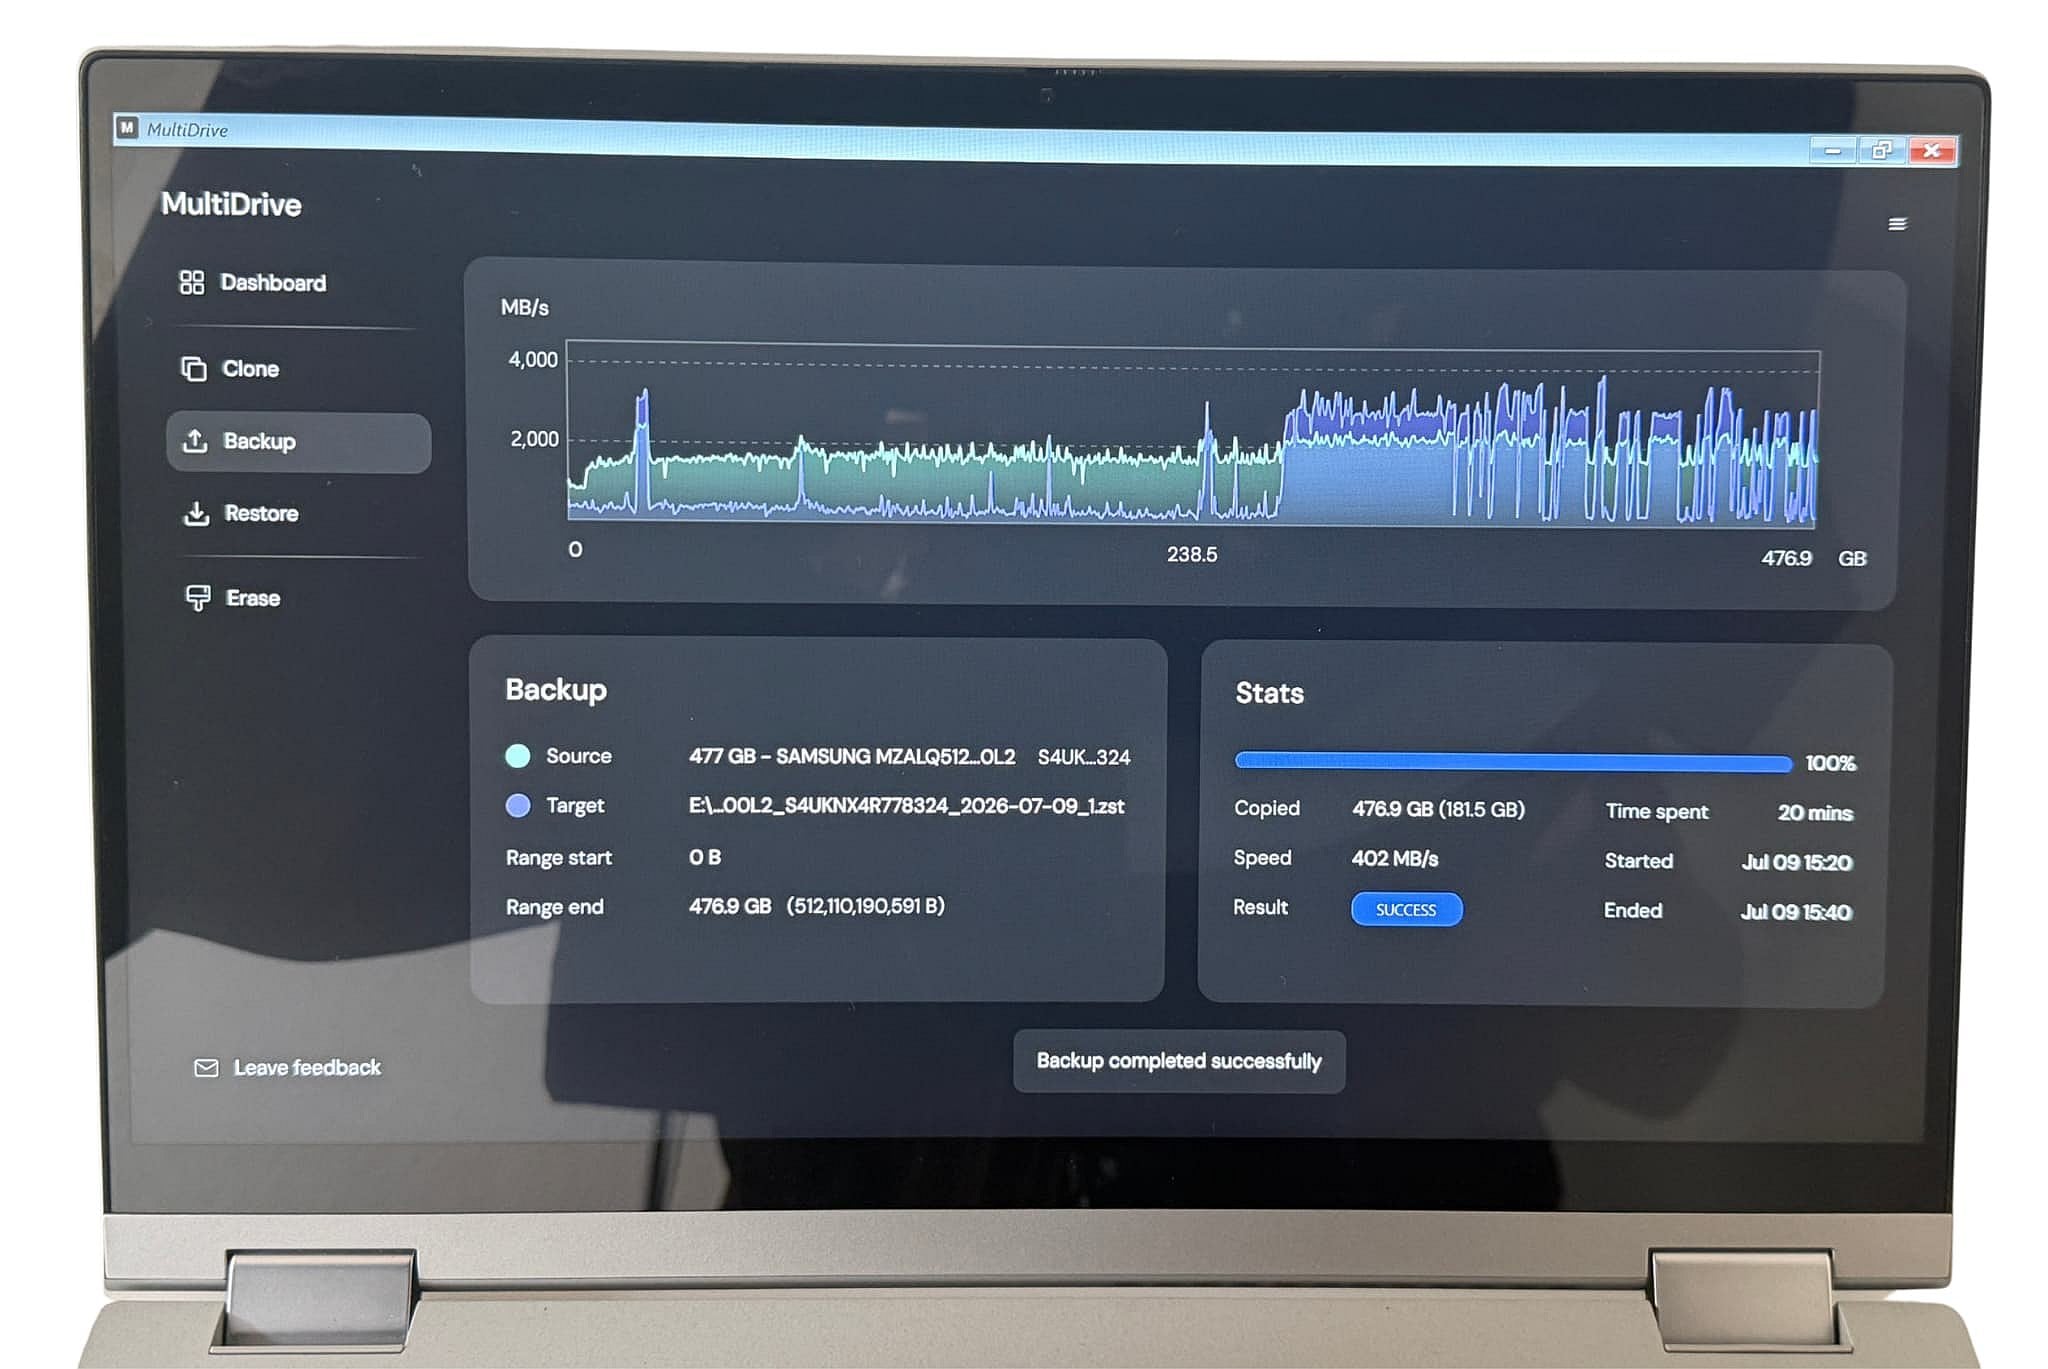
Go to Backup, select your laptop's system drive as the Source, and the external drive as the Target. Then select the backup format.
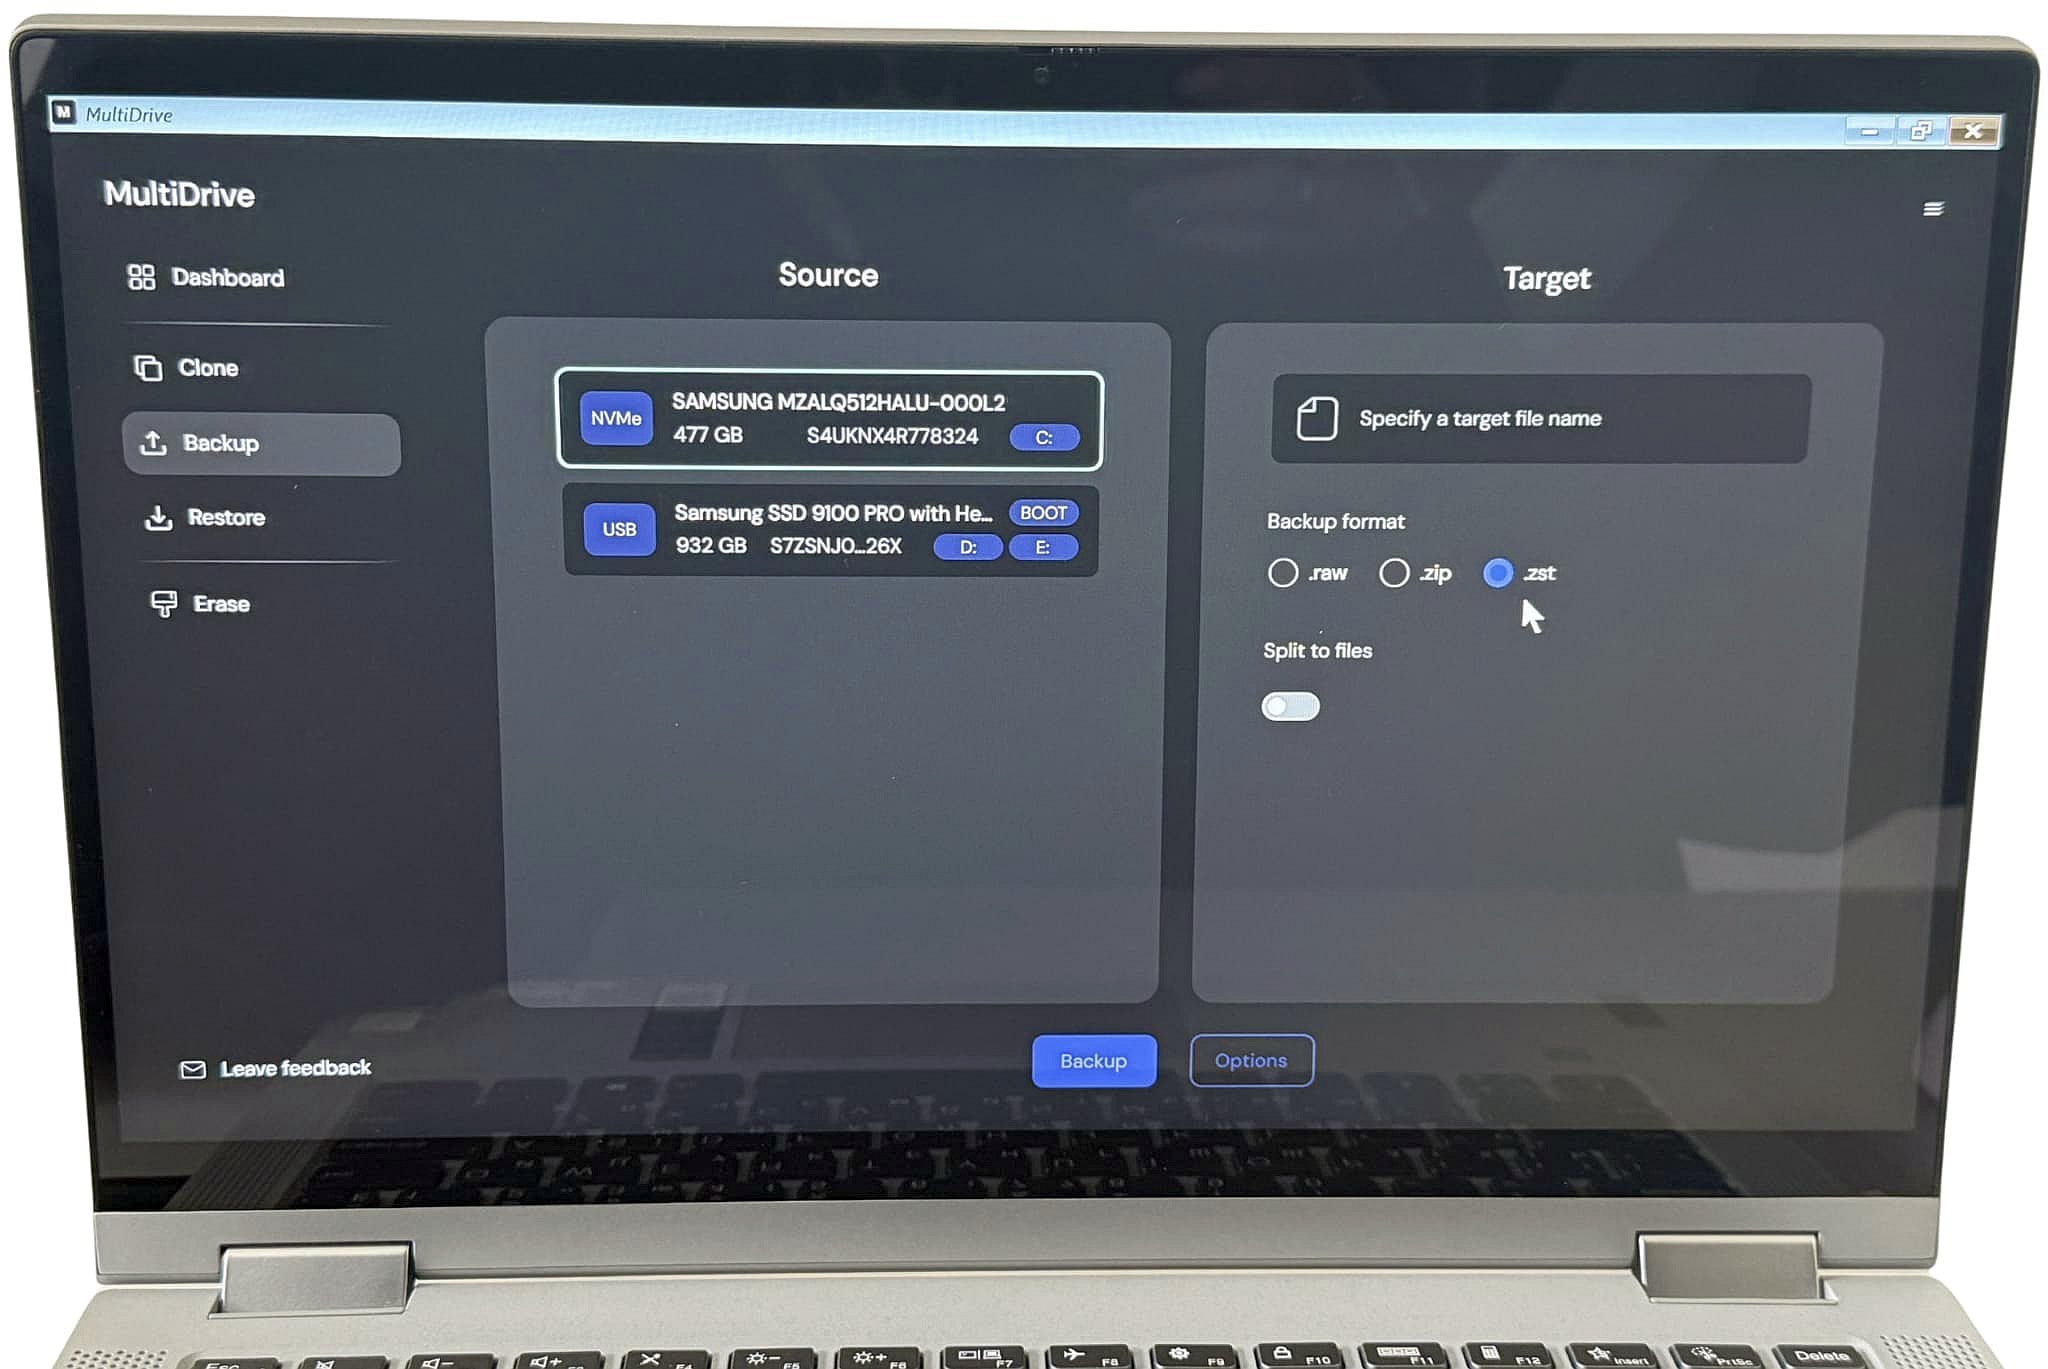
Double-check the selection, then click Backup.
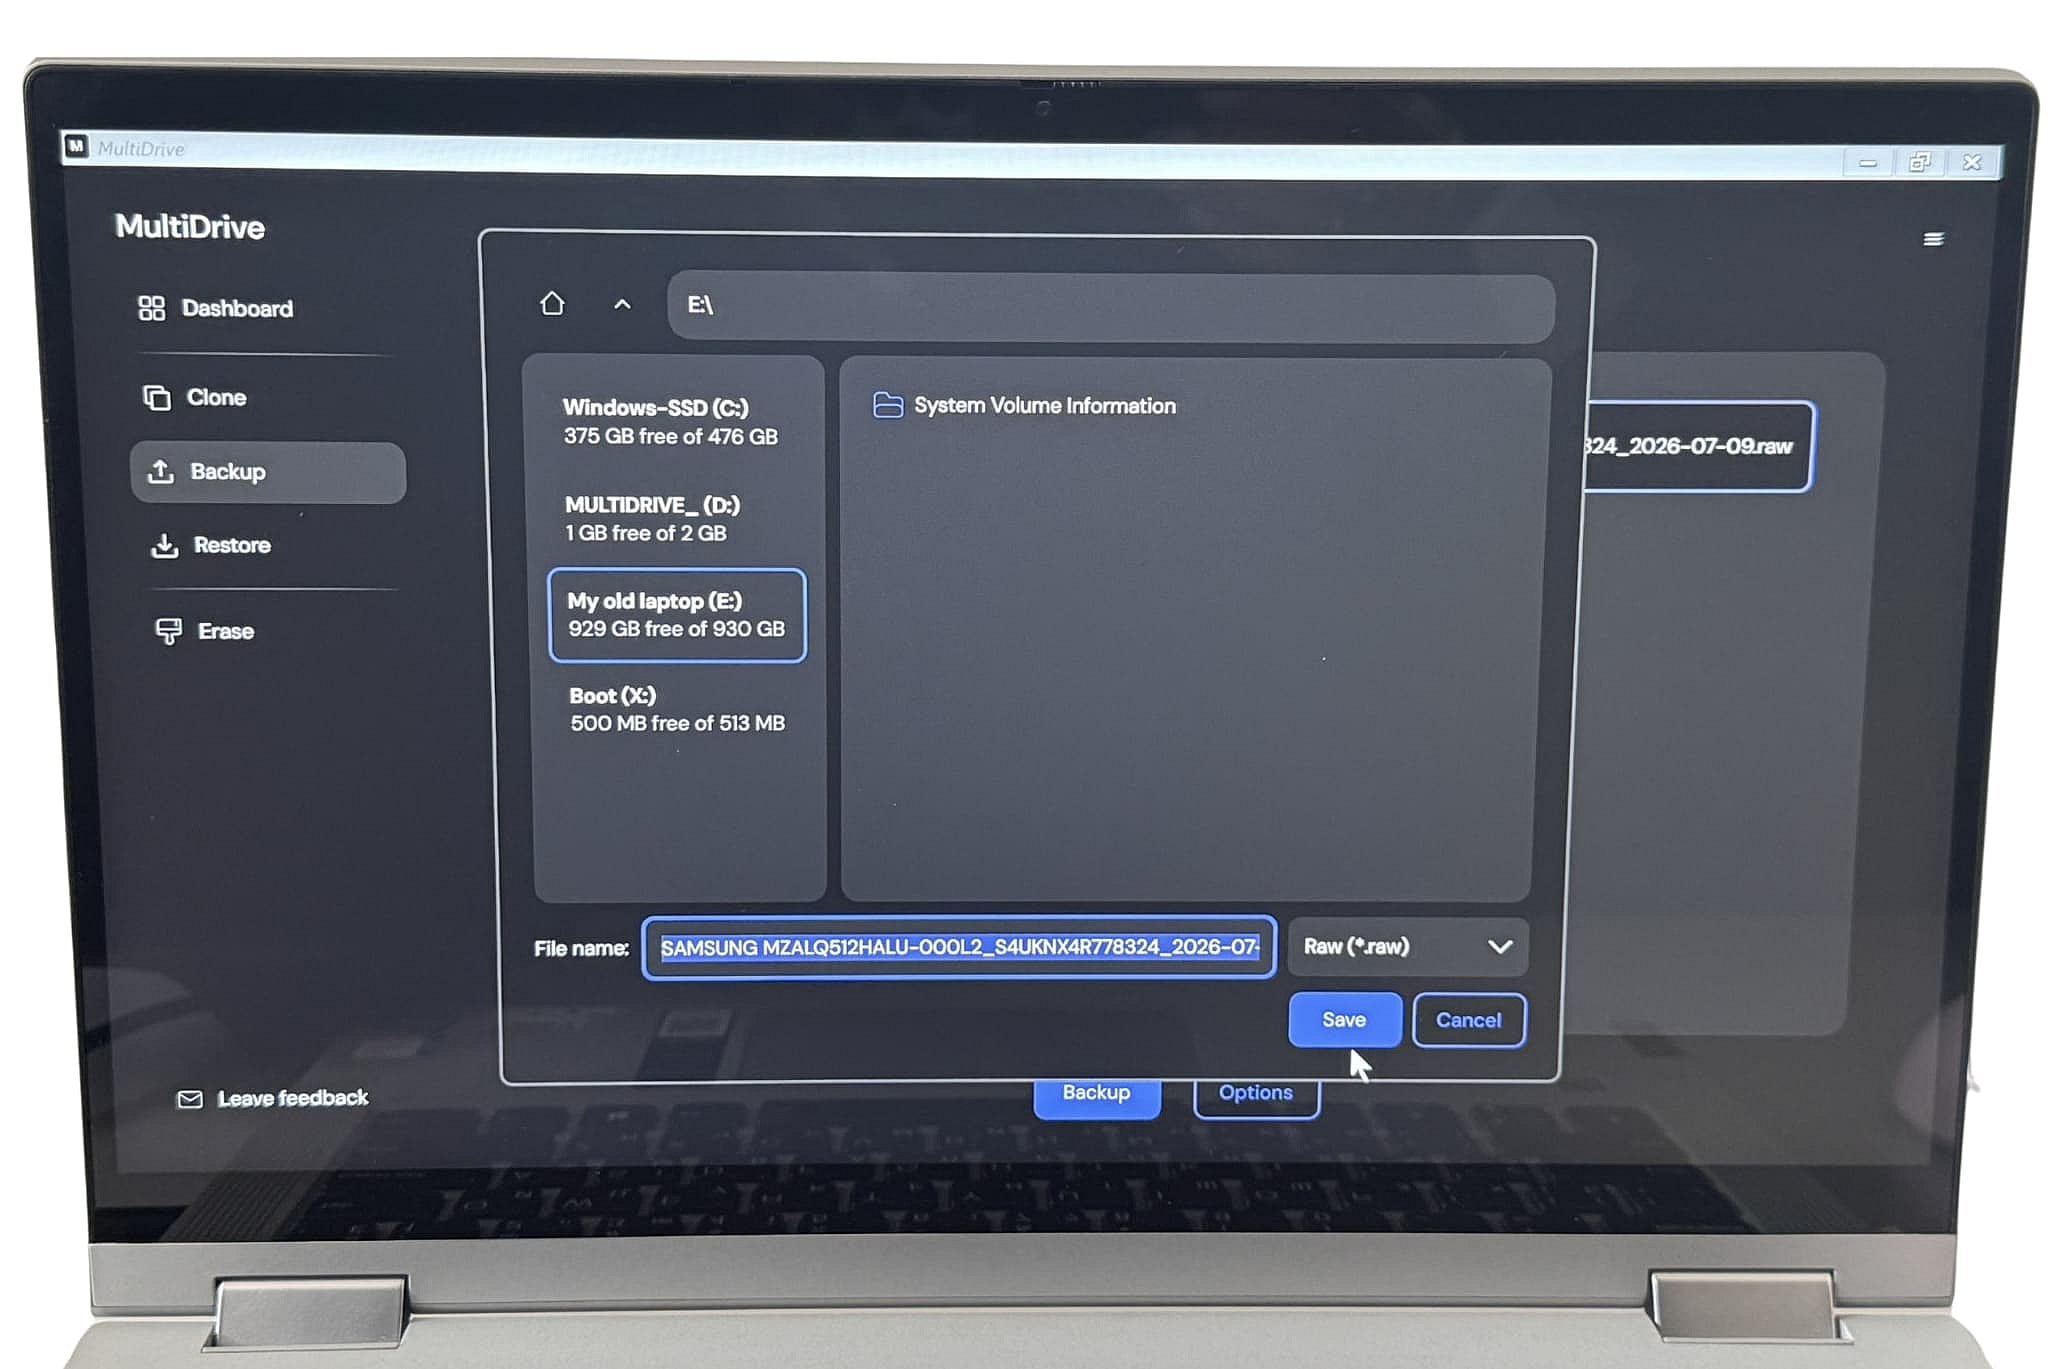
This transfers everything from your old PC onto the external drive.
Bear in mind that the backup-and-restore process takes longer than direct drive-to-drive cloning. However, since it is not possible to physically remove a laptop's internal drive and connect it elsewhere, this is the most practical way to migrate a laptop's entire system.
When the process shows Success, the backup is complete.
Step 5. Connect the external drive to the new laptop
To continue migrating data, let's unplug the external drive from the old laptop and connect it to the new one.
Step 6. Boot from the external drive and restore the image
Power on the new laptop and enter BIOS as it starts (F2, F10, F12, Delete, or Escape, depending on the manufacturer).
The laptop will boot into WinPE with MultiDrive already loaded.
Go to Restore, select the backup on the external drive as the Source, and the new laptop's internal drive as the Target.
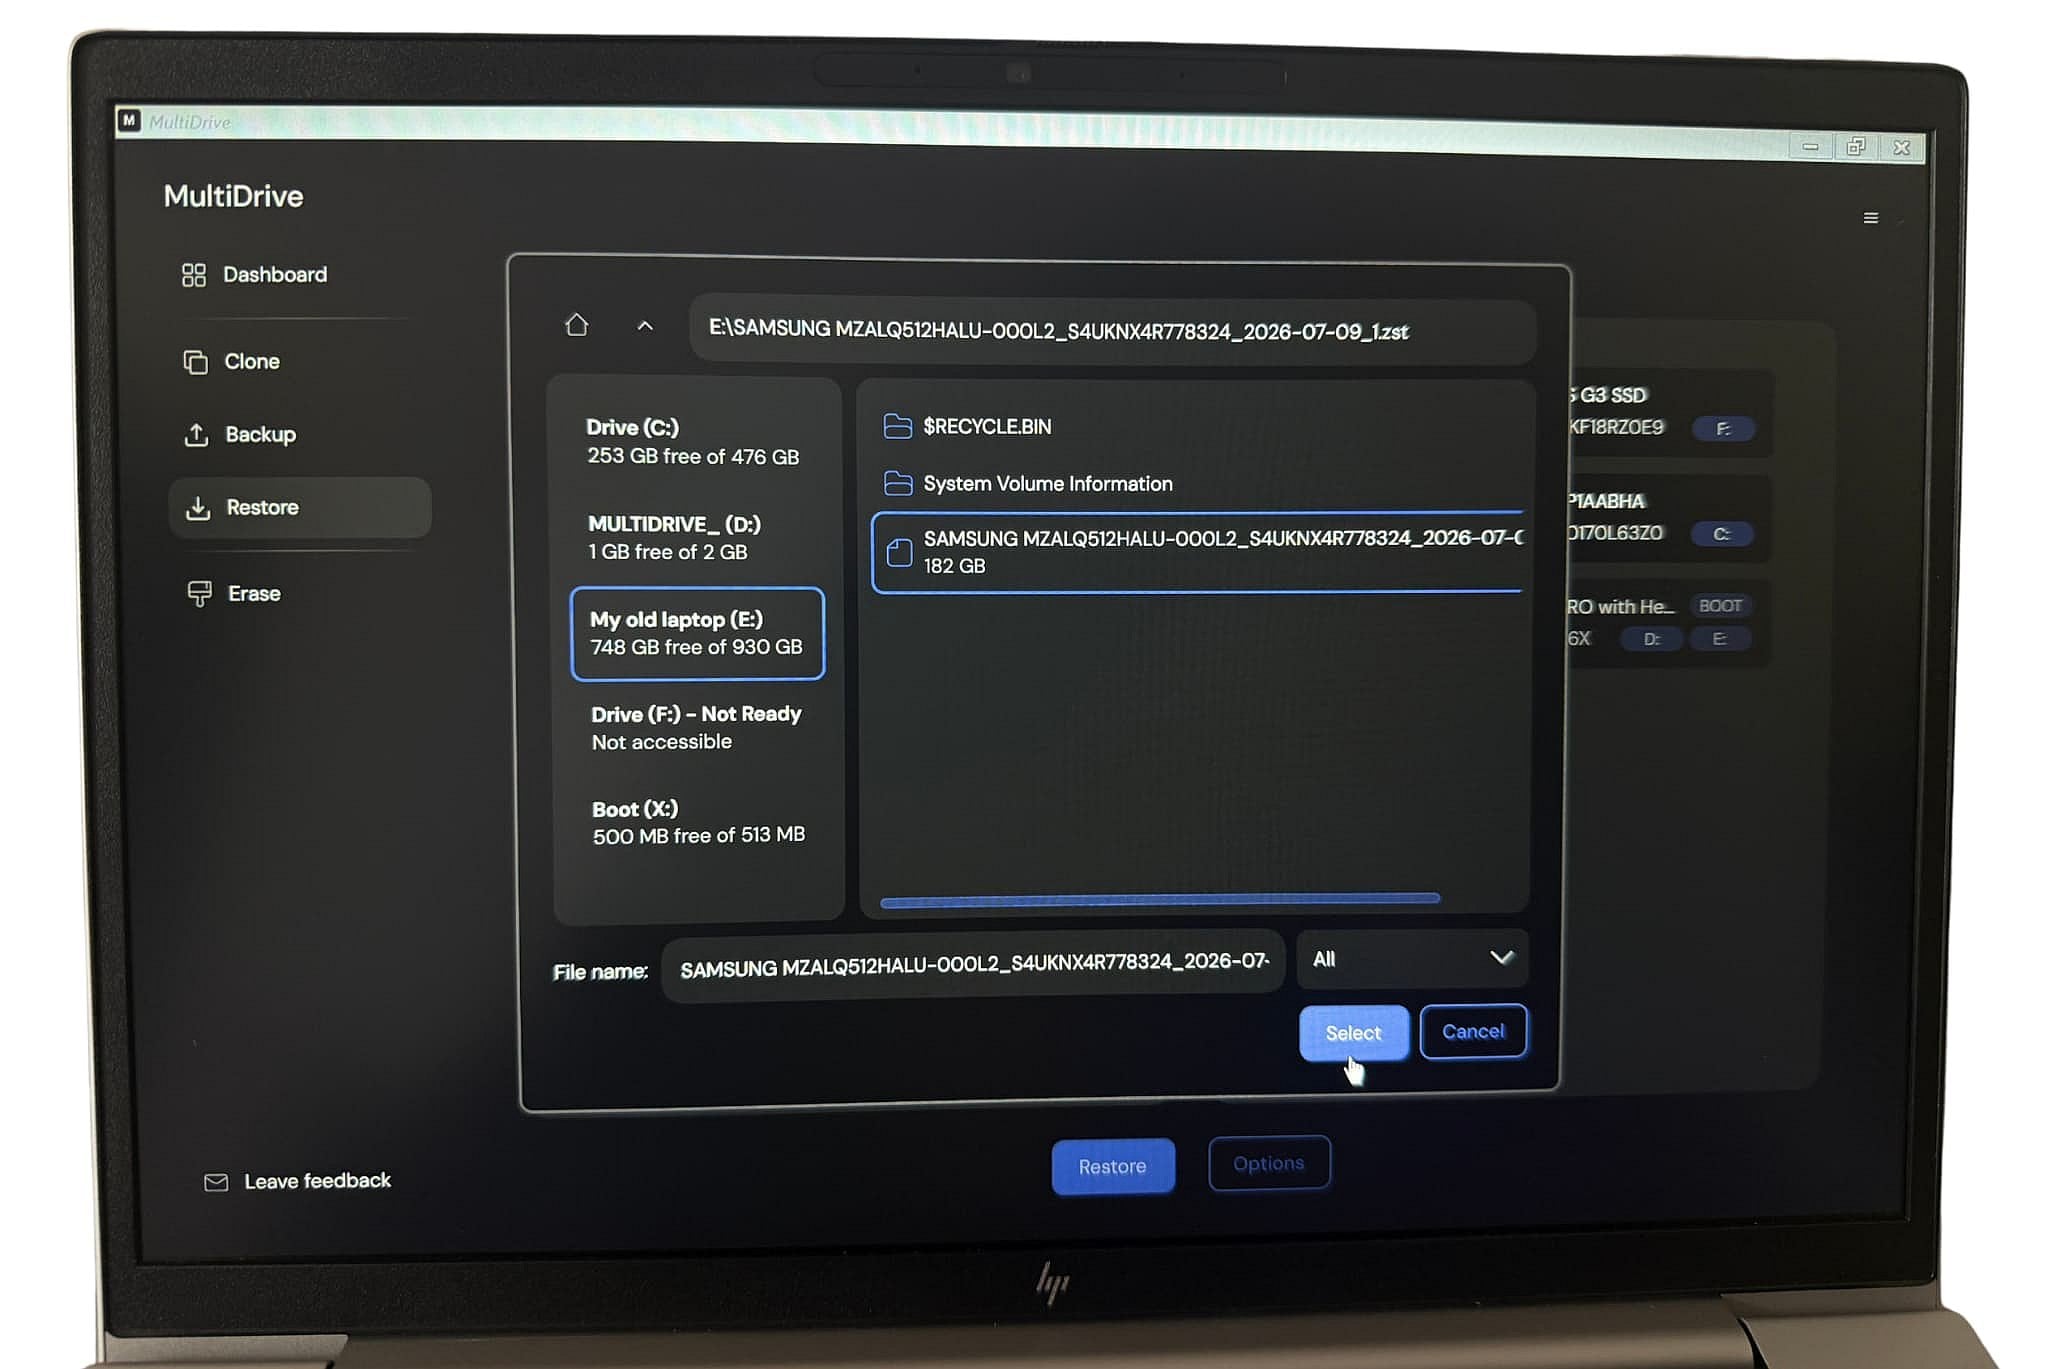
Carefully double-check this step: the contents of the backup will completely overwrite the new laptop's drive.
Click Restore. A time estimate will then appear at the bottom of the screen.
Once it displays Success, shut down the laptop, unplug the external drive and power the laptop back on normally.
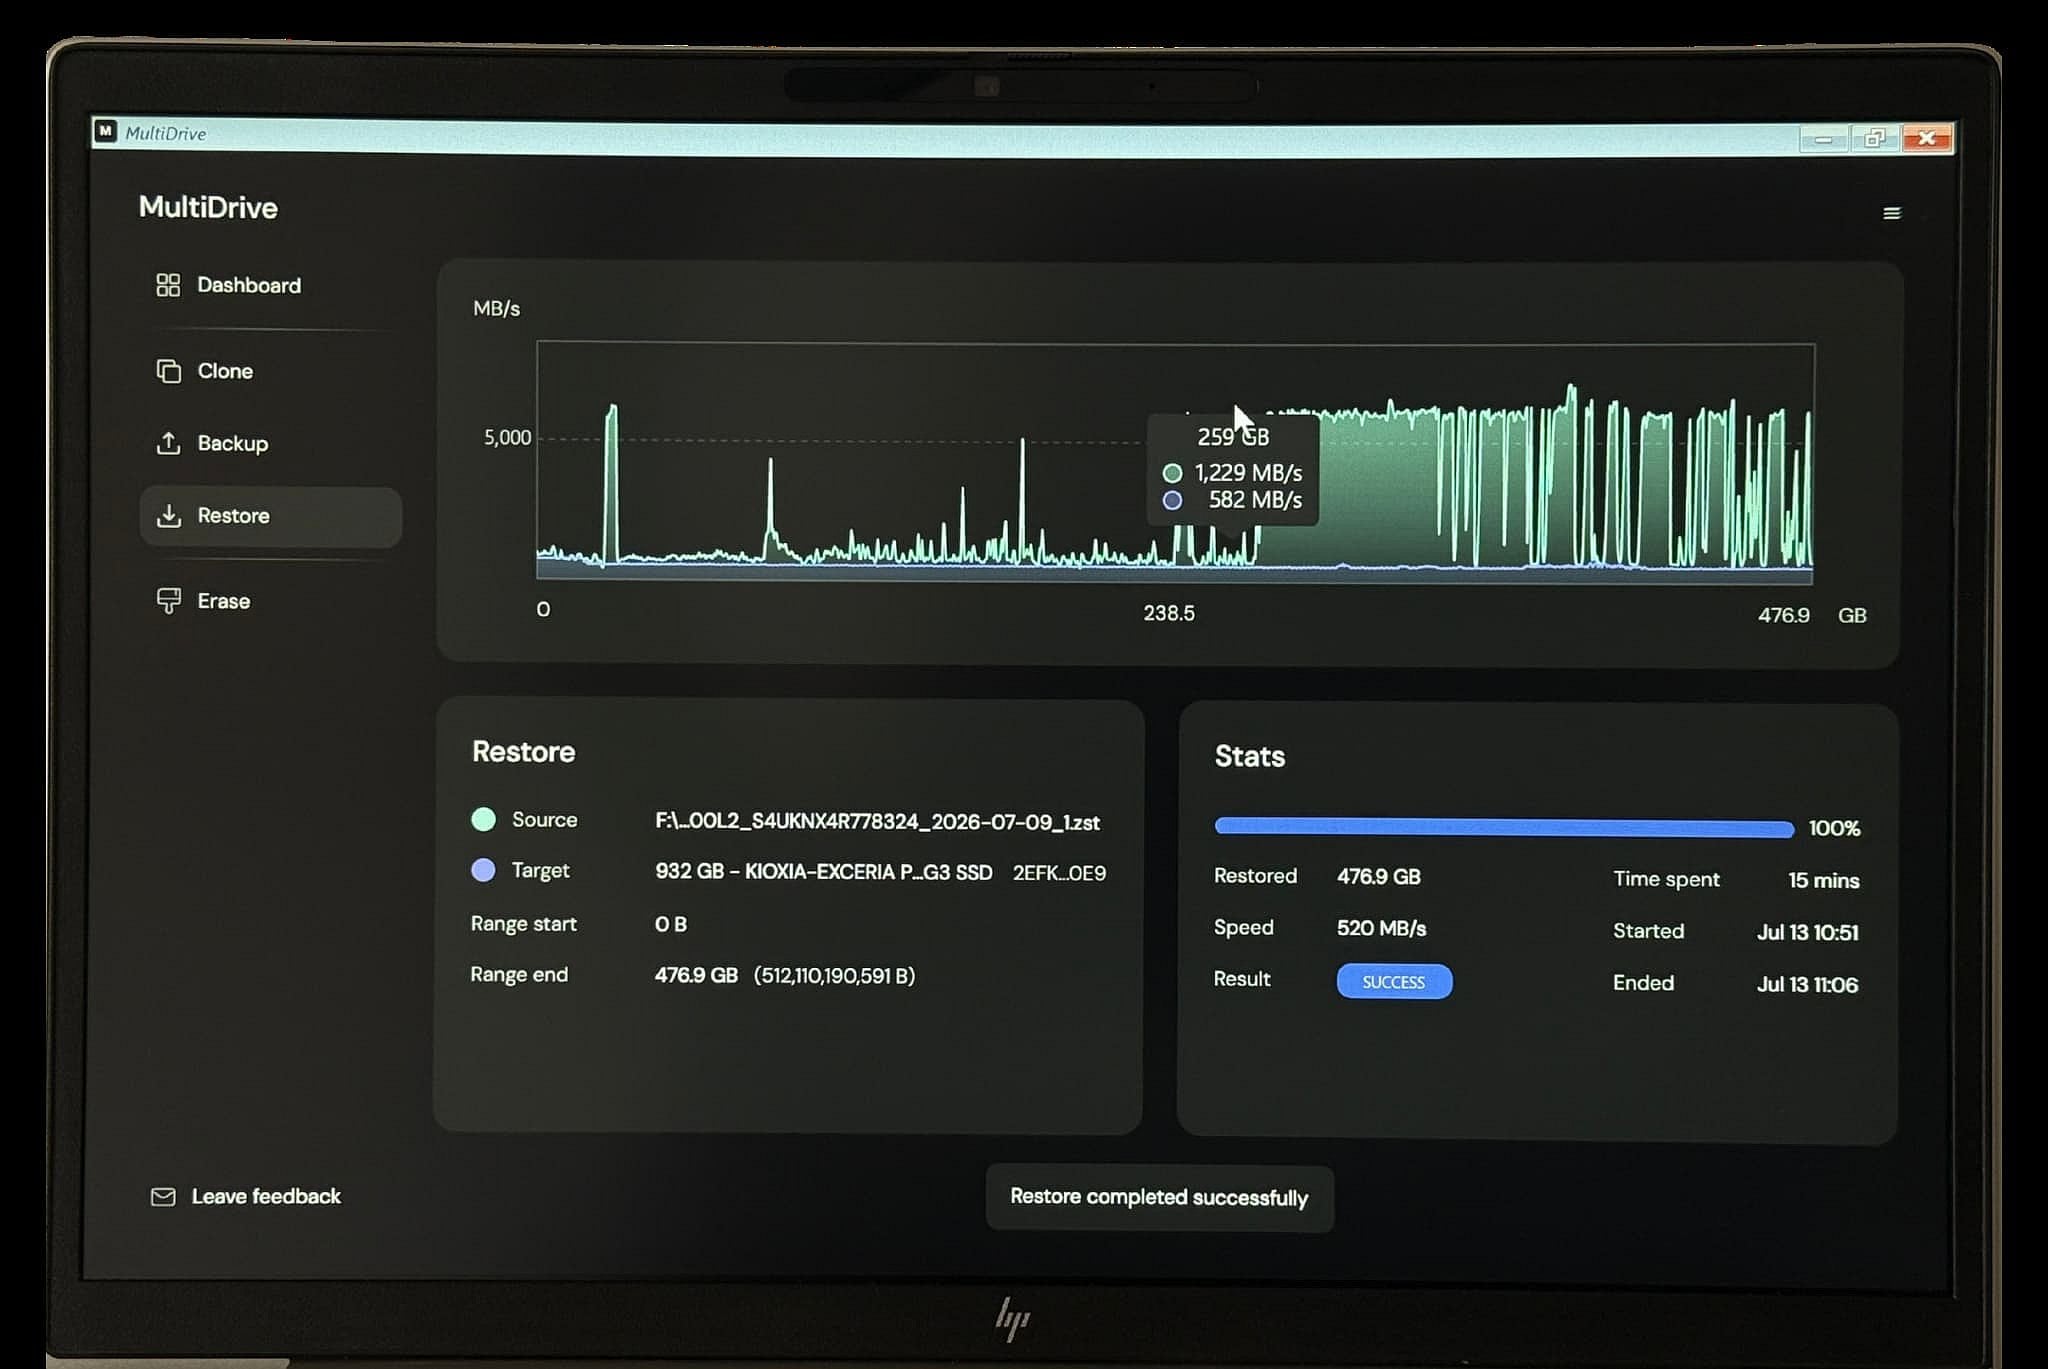
Your new laptop is now set up exactly the way your old one was. No reinstalling, no reconfiguring, no lost settings.
Ready to transfer your PC?
Download MultiDrive and the WinPE image and follow the steps above.
FAQ
Verify Source/Target selections carefully, as the Target drive will be overwritten. Then check these common points:
- Confirm you booted the new laptop from the external drive (not the internal Windows install).
- Make sure BitLocker was turned off on the old PC before the backup, or that you have the recovery key.
- Retry the restore with a stable USB connection (prefer USB 3.x ports and a powered enclosure if you use one).
If you still encounter technical errors, contact MultiDrive support.
Yes. This process applies to any two computers where a direct internal drive connection is not possible — desktops, laptops, or a mix of both. The type of PC does not matter; what matters is that you can boot both machines from the same external WinPE drive and restore to the new internal drive.
If both drives can be connected to the same computer at the same time — for instance, when upgrading a desktop or swapping a laptop's internal drive — you don't need the backup-and-restore method described above.
Instead, use MultiDrive's Clone feature: select your old HDD as the Source and your new SSD as the Target, then click Clone. MultiDrive transfers everything from one drive to another, and it's typically faster than a full backup and restore. You can also follow our guide on how to clone HDD to SSD.
If your cloned drive won't boot, check out the article: Cloned Drive Won't Boot – How to Fix It
MultiDrive backs up and restores your entire system drive, so your installed programs transfer along with your files and settings, not just your data. Normally, you won't need to reinstall your apps or re-enter license keys on the new PC.
Some apps may be linked to the hardware, though. Then you will have to deal with their makers individually: logging in to your account, unlinking the app from the old PC, and linking to the new one.
MultiDrive is free PC transfer software with no ads, nag screens, or hidden fees. Download MultiDrive and the WinPE image at no cost.
Author